
Abby’s (Almost) Local Apple Butter
By Abby Parker
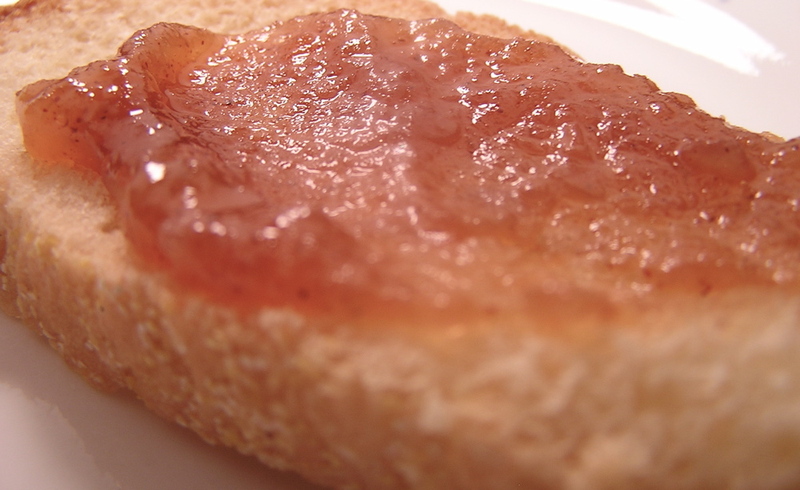
Although it seems odd because I will soon be married to the food-loving Paupered Chef (Nick), I was a very picky eater as a child. I did not just abhor the typical foods, but also disliked peanut butter, all carbonated beverages, and even bread. Other than McDonald’s, only one food item made me excited to eat: my mother’s yearly batch of apple butter. I would even eat it on bread.
We had two apple trees in the backyard of my childhood home, and every fall my mom would turn the harvest into this sweet, spreadable goodness. Neighbors and family members could expect a jar around the holidays, but we had to keep many on hand to fill my cravings. Even today nothing reminds me of fall like the smell of apple butter bubbling away on the stove.
I did not show much interest in cooking as a child, probably due to my dislike of food in general. As that has changed, I often find myself regretting that I did not learn any of my mother’s tricks in the kitchen while I had the chance. She unfortunately wrote down few of her recipes, although I like to think that she would have really gotten into this whole food blogger thing of recent years.
As Nick and I embarked on our month of eating locally, the farthest booth at the farmers’ market continued to catch my attention with its bags and barrels of Ohio apples. I felt compelled to try my hand at my mom’s specialty, so one Saturday I asked for a mix of the best apples for making apple butter and came home with enough for 5 jars worth. The same booth also sells apple cider, which is required for this recipe. My apple butter is mostly local, but unfortunately cinnamon, cloves, and lemon are not readily available in Ohio. As seen by our localvore rules , however, spices are allowed.
The name “apple butter” is confusing to some because there is no butter or other fat involved; however, unlike a typical jam or preserve, no pectin is involved. The name arose because of the consistency, which is smooth and thick like butter. It is generally agreed that the first step is to create apple sauce, which Blake has successfully made before . Some recipes also call for contraptions such as sieves or hand-crank food processors, which we do not possess. Luckily I found a recipe from 101 Cookbooks , requiring nothing fancy and actually cutting some of the typical applesauce-making steps. It was perfect for a first try, and it turned out so well that I may stick to this recipe in the future. I plan to fill the rest of my 12-jar set for holiday gifts. The most intimidating part for me was the canning, but despite the difficulty of finding cans (you have to go to hardware store, not even Walmart carries them around here), canning turned out to be fairly simple.
Apple Butter
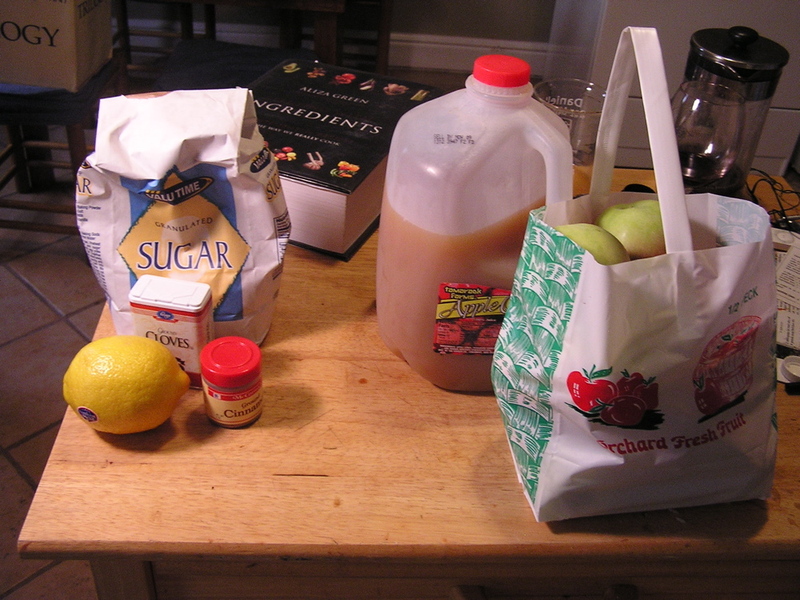
- 4 pounds of apples (just under a ½ peck)- a mix of sweet and a little tart is best
- ½ gallon of apple cider
- 2 cups sugar
- 1 ½ teaspoons cinnamon
- ½ teaspoon cloves
- Juice of 1 lemon
Special Equipment: jars, candy thermometer
Makes enough for 5 jelly jars (8 oz. each)
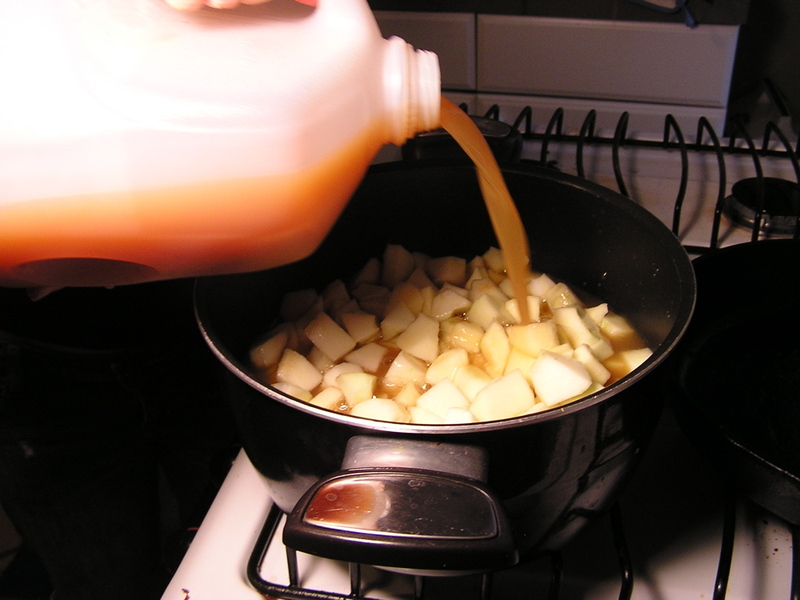
First, you peel the apples and cut them into bite-sized chunks. Place them in a big pot and add the apple cider. Over medium-high heat, bring to a simmer. Some foam will rise to the top, which you should spoon off. Cook the apples for about 25-30 minutes, until they are tender all the way through.
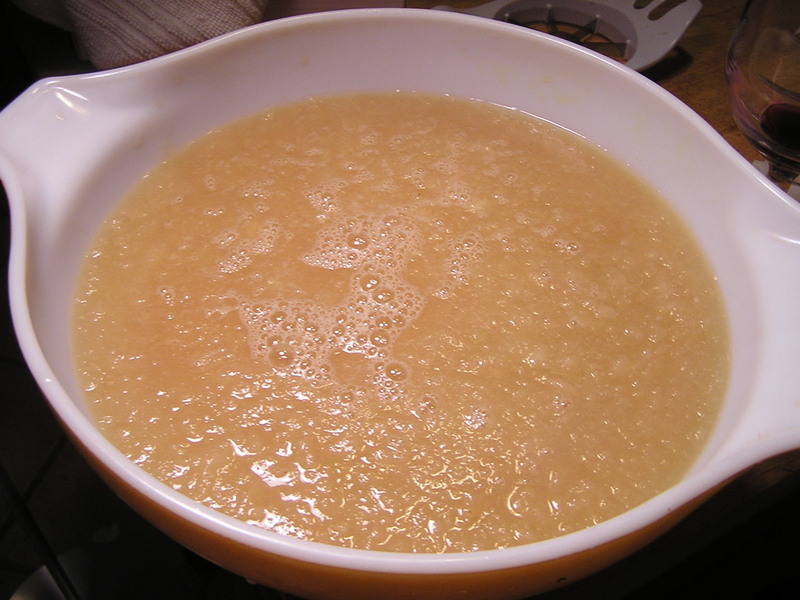
Remove from heat and let the apples cool for about five minutes. Then puree the mixture in the blender (you will have to do it in batches, unless you have an immersion or large, industrial size one). You want the result to still be a little chunky, like a thin applesauce.
Put the puree back in your pot over medium or medium-low heat. When it reaches 220F on the candy thermometer, add the spices and lemon juice. Stir slowly to incorporate the wonderful flavors throughout.
The final stage will take awhile, up to 2 hours. Leave the pot on medium heat and stir regularly. You are just playing a waiting game until you actually have apple butter. The mixture will become thicker and darker. It will become messy, with lava-like splattering, and then you know the end is near. When you are satisfied with the thickness, you can remove the pot from the heat.
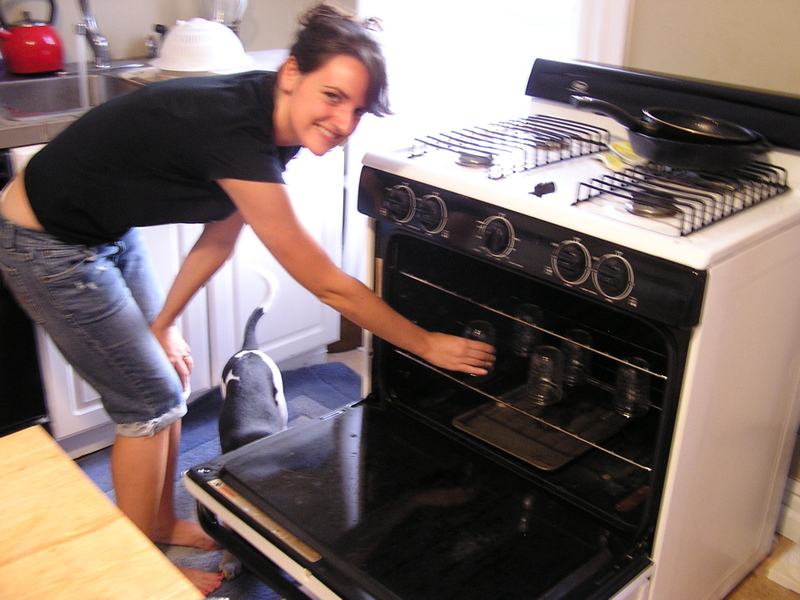
During the final stage, you need to prepare the jars. First, preheat the oven to 225. Wash the lids with soap and water and dry them completely. Then place the jars, but not the lids, in the oven for at least 20 minutes. This process sterilizes the jars for proper canning.
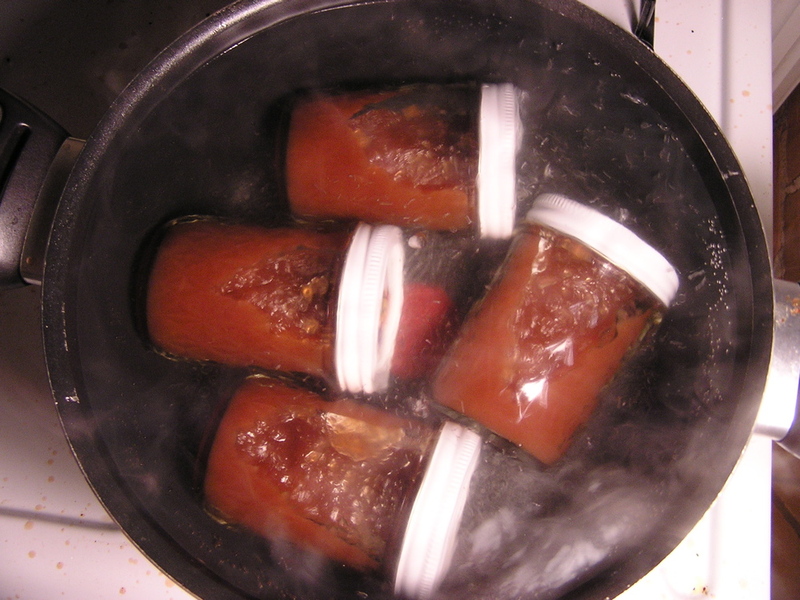
As soon as your apple butter is finished, bring a big pot of water to bowl. Hopefully you have more than one big pot so you do not have to scoop out the apple butter and clean the pot, like I did. Carefully remove the jars from the oven and fill them will apple butter within a ¼ inch of the top. Screw the lids on completely and place the jars in the boiling water for 10 minutes.
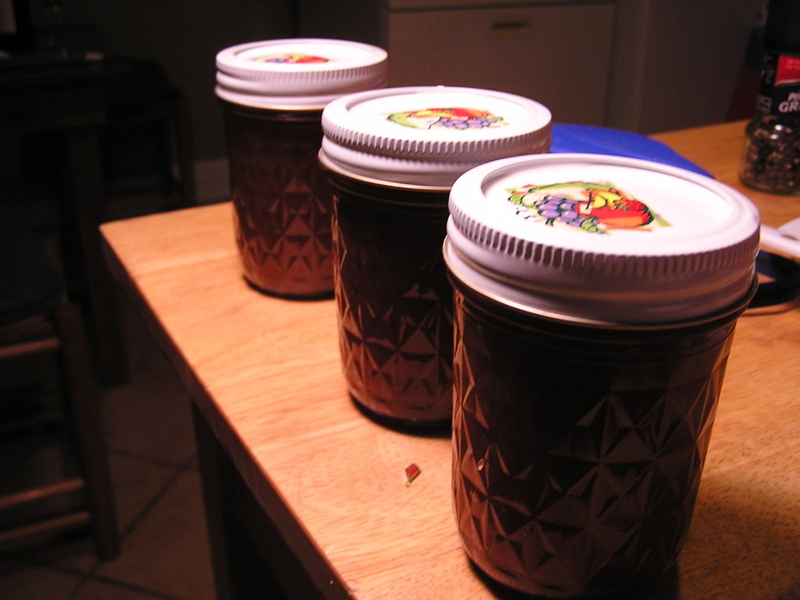
To see if you have a proper seal, push down on the top of the lid. If it does not give at all, then your canning has been a success. The jars of apple butter will make great gifts, or at least keep your pantry stocked for a few months. Enjoy!
Apples, Butter, Canning, Canning / Preserving, Fruit
Comments:
Blog Comments powered by Disqus.